Monday, March 21, 2011

Breakfast: It's What's For Dinner

Every month we get a shipment of artisan bacon from The Pig Next Door. It's been the wedding gift that keeps on giving and I'd be lying if I said I didn't look forward to it arriving at my door. The weird thing is that Drew and I don't eat a ton of bacon. It's just not something we keep in our fridge because if we did I think we would wouldn't eat anything else. Bacon would go on everything and then, before you know it, we both weigh a trillion pounds and I am writing a diet blog instead.

Tonight, I am using our special monthly splurge to make breakfast for dinner. I've said it once and I'll say it again, breakfast for dinner is bomb. My mom used to do this for us when we were kids and OMG we loved it. I'm going to keep it simple and old school...just some fried eggs, baked beans and sizzling strips of bacon. Adults deserve to feel like kids everyone once and awhile.
Share/Save/Bookmark

Monday, March 14, 2011

Pimento Mac and Cheese

This month's Bon Appetit is all about baked pasta dishes so it's no wonder that the cover article and photo (above) caught my eye. I mean, look at that bowl of gooey cheese goodness. I've added several recipes on this blog over the years with pimento peppers because I grew up in a house that had a minimum of 6 jars on-hand at all times. My mothers is the pimiento QUEEN.

Pimento peppers are not hot rather they're sweet and more aromatic than a red bell pepper. They are tough to find fresh and easy to find canned or jarred at your local grocery. Cost is usually a buck per small can so grab a couple to keep in your pantry. You can never have too many.

Pimento Mac and Cheese
  • 1 7- to 8-ounce red bell pepper, seeded, cut into 1-inch pieces
  • 2 garlic cloves, halved, divided
  • 1/2 cup panko (Japanese breadcrumbs)
  • 3 tablespoons unsalted butter, room temperature, divided
  • 1/2 cup freshly grated Parmesan cheese, divided
  • 3/4 cup drained mild Peppadew peppers in brine, 1 tablespoon brine reserved
  • 1/4 teaspoon ground ancho chiles
  • 1 1/4 cups (packed) coarsely grated extra-sharp cheddar cheese
  • 1 cup (packed) coarsely grated whole-milk mozzarella
  • 8 ounces medium shell pasta or gemelli

Preparation

  • Bring 1/2 cup water, bell pepper, and 11/2 garlic cloves to boil in small saucepan. Cover; reduce heat to medium-low. Simmer until pepper is soft, about 15 minutes.
  • Toast panko in skillet over medium-high heat until golden, stirring often, 5 to 6 minutes. Transfer to bowl; cool to lukewarm. Rub 1 tablespoon butter into crumbs to coat. Mix in 1/4 cup Parmesan.
  • Transfer bell pepper mixture to processor. Add Peppadews and 1 tablespoon brine, 2 tablespoons butter, ground chiles, and 1/2 garlic clove; then add cheddar and 1/4 cup Parmesan. Blend until sauce is smooth; season to taste with salt and pepper.
  • Preheat oven to 400°F. Butter 8-cup baking dish (or 6 individual dishes). Cook pasta in pot of boiling salted water until tender but still firm to bite. Drain; return to pot. Stir sauce and mozzarella into pasta. Season with salt and pepper. Spoon pasta into dish. Sprinkle with crumb topping.
  • Bake pasta until topping is crisp and sauce is bubbling, about 25 minutes (15 for individual). Let stand 10 minutes.

Share/Save/Bookmark

Wednesday, March 2, 2011

Ad Hoc's Chicken Soup with Dumplings

Drew is home sick today from work and that means that it's time to whip up some chicken soup. I am a huge fan of Thomas Keller's Ad Hoc at Home cookbook and his recipe for Chicken and Soup with Dumplings is the perfect medicine for my husband. This cookbook focuses on classic family-style recipes that aim to gather folks around the dinner table and warm the soul. I've cooked a ton of recipes from this book and never been disappointed.

Chicken Soup with Dumplings
Makes: 6-10 servings (about 8 cups)
WSJ & Thomas Keller

1 tablespoon (1/2 ounce) unsalted butter
1 cup thinly sliced carrots
1 cup coarsely chopped celery
1 cup coarsely chopped onion
1 cup coarsely chopped leek
Kosher salt

Dumplings:
1/2 cup water
4 tablespoons (2 ounces) unsalted butter
1 1/2 teaspoons kosher salt
2/3 cup all-purpose fl our
1 teaspoon Dijon mustard
2 large eggs
1 tablespoon plus 1 teaspoon minced chives
4 quarts Chicken Stock (page 339)
5 stalks celery
3 large carrots
1 teaspoon honey
1 bay leaf
2 thyme sprigs
1 large garlic clove, crushed, skin left on
Kosher salt and freshly ground black pepper
1/2 cup (about 4 ounces) Roux (page 334)
2 cups cooked shredded chicken (dark or white meat)
1/4 cup minced chives
1 tablespoon champagne vinegar
Flat-leaf parsley leaves

Melt the butter in an 8- to 10-quart stockpot over medium heat. Add the carrots, celery, onions, and leeks, season with salt, and cover with a parchment lid. Reduce the heat to low and cook very slowly, stirring occasionally, 30 to 35 minutes, until the vegetables are tender. Remove and discard the parchment lid.

Make the dumplings: Fill a wide deep pot with salted water and bring to a simmer. Set up a stand mixer fitted with the paddle attachment.

Combine the water, butter, and 1 teaspoon of the salt in a medium saucepan and bring to a simmer over medium-high heat. Reduce the heat to medium, add the fl our all at once, and stir rapidly with a stiff heatproof or wooden spoon until the dough pulls away from the sides of the pan and the bottom of the pan is clean. The dough should be glossy and smooth but still moist; enough moisture must evaporate from the dough to allow it to absorb more fat when the eggs are added. Continue to stir for 4 to 5 minutes, adjusting the heat as necessary to prevent the dough from coloring; a thin coating of dough will form on the bottom and sides of the pan. When enough moisture has evaporated, steam will rise from the dough and the nutty aroma of cooked flour will be noticeable.

Immediately transfer the dough to the mixer bowl. Add the mustard and the remaining 1/2 teaspoon salt and mix for a few seconds to incorporate the ingredients and release some of the heat. With the mixer on the lowest speed, add the eggs one at a time, beating until the first egg is completely incorporated before adding the second and incorporating it. Then add the chives and incorporate. Remove the bowl from the mixer.

Line a baking sheet with parchment paper. Shape the dumplings using two soup spoons to make a quenelle shape (see note), dropping them into the simmering water. Cook the dumplings in batches of about 6 to avoid crowding the pot and allow them to cook evenly. Once the dumplings rise to the surface, it will take about 5 minutes for them to cook; remove one and break it open to make sure it is cooked. With a slotted spoon, transfer the dumplings to the baking sheet, and cook the remaining dumplings. (You will have about 18 dumplings.)

Once the dumplings have cooled, trim any uneven edges with scissors.

Finish the soup: Add the chicken stock to the vegetables and bring to a simmer. Simmer for 30 minutes, then strain the soup base into another pot and discard the vegetables.

Peel the celery stalks with a peeler. Cut each stalk crosswise on the diagonal into thin slices about 11/2 inches long. As you get to the wider lower part of the stalk, adjust the angle of your knife to keep the pieces relatively the same size. You need about 1 1/2 cups celery for this recipe (reserve any extra for another use). Cook the celery in a large pot of boiling salted water (see page 147) until just tender. Drain, cool in an ice bath, and drain again.

Cut the carrots lengthwise into quarters and then crosswise into bite-sized pieces. As each carrot widens, adjust the size of the cut to keep the pieces bite sized. You need about 1 1/2 cups carrots for this recipe (reserve any extra for another use).

Put the carrots in a saucepan, add the honey, bay leaf, thyme, garlic, and a pinch of salt and pepper, and cover with cold water. Bring to a simmer and cook for 4 to 5 minutes, or until the carrots are tender but slightly resistant to the tooth. Drain and transfer to paper towels.

Bring the soup base to a simmer and whisk in the roux a little at a time until thick enough to coat the back of a spoon; you may not use all the roux. Simmer for 30 minutes, skimming often—this is necessary to remove all impurities from the roux. (The soup will continue to thicken as it simmers.)

Add the dumplings, chicken, carrots, celery, and chives to the soup and heat through. Season with the vinegar and salt and pepper to taste.

Transfer to a large serving bowl and sprinkle with parsley leaves.

Note: To form a three-sided quenelle using two soupspoons, start by using one spoon to scoop up a portion of dough that is slightly smaller than the bowl of the spoon. Hold the second spoon in your other hand, place the side of the spoon against the far side of the dough, and scoop it onto the second spoon, forming one smooth long side. Continue transferring the dough between the spoons until you have the desired oval football shape. (With practice, this should take no more than three transfers, but it may require more when you are first getting started.) Before you begin, set up a container of hot water in which to regularly dip the spoons—this will make it easier to form the quenelles.
Share/Save/Bookmark

Wednesday, February 23, 2011

Eggs Poached in Tomato Sauce

Drew and I save a lot of money by buying bulk items at Costco like cheeses, eggs and proteins. While saving money is great, it can be challenging to come up with new ways to cook the same ingredients every week. That's what makes this recipe so great. Most of these ingredients are always in our pantry or fridge yet it's a very unique and flavorful dish. Did I mention that we love eggs and breakfast dishes for dinner?

Eggs Poached in Tomato Sauce
Saveur

1/4 cup extra-virgin olive oil
5 Anaheim chiles or 3 jalapeños, stemmed,
seeded, and finely chopped
1 small yellow onion, chopped
8 cloves garlic, crushed
1 tsp. ground cumin
1 tbsp. paprika
1 28-oz. can whole peeled tomatoes,
undrained
Kosher salt, to taste
8 eggs
1/2 cup crumbled feta cheese
1 tbsp. chopped flat-leaf parsley
Warm pita, for serving

1. Heat oil in a 12" skillet over medium-high heat. Add chiles and onions and cook, stirring occasionally, until soft and golden brown, about 6 minutes. Add garlic, cumin, and paprika, and cook, stirring frequently, until garlic is soft, about 2 more minutes.

2. Put tomatoes and their liquid into a medium bowl and crush with your hands. Add crushed tomatoes and their liquid to skillet along with 1/2 cup water, reduce heat to medium, and simmer, stirring occasionally, until thickened slightly, about 20 minutes. Season sauce with salt.

3. Crack eggs over sauce so that eggs are evenly distributed across sauce's surface. Cover skillet and cook until yolks are just set, about 5 minutes. Using a spoon, baste the whites of the eggs with tomato mixture, being careful not to disturb the yolk. Sprinkle shakshuka with feta and parsley and serve with pita, for dipping.

SERVES 4 – 6
Share/Save/Bookmark

Thursday, February 10, 2011

Classic Champagne Cocktail

Dear Reader, we are moving! After an exhaustive search spanning over a year, Drew and I found our dream home in Sausalito and are preparing for the arrival of our Bernese puppy in May. This calls for some serious celebration!

To toast the new digs, I'll be whipping up this easy cocktail; a spin on the classic celebration drink.

Classic Champagne Cocktail
Epi
  • 1 sugar cube
  • Angostura bitters
  • Champagne (or I like to sub with prosecco)
  • Lemon or orange twist, for garnish

Soak the sugar cube in Angostura bitters and drop into a champagne flute. Top with a luxury champagne or a sparkling wine. Garnish with a lemon or orange twist.


Share/Save/Bookmark

Tuesday, February 1, 2011

Meatball-and-Provolone Subs

Game day is just around the corner and, if you're like me, you'll be having guests over for the big game. Time to menu plan. Why not try these delicious meatball-and-provolone subs that were recently featured in F&W? You can use canned sauce to save time and you can make these ahead of time. Like any sandwich, bread is key so make sure to get fresh, soft rolls to make your fans happy.

Meatball-and-Provolone Subs
  1. 1 tablespoon extra-virgin olive oil, plus more for brushing
  2. 1 medium onion, finely chopped
  3. 6 large garlic cloves, minced
  4. 2 teaspoons dried oregano
  5. 1 teaspoon fennel seeds
  6. 1/2 teaspoon dried sage
  7. 1/2 teaspoon crushed red pepper
  8. 1 cup plain dried bread crumbs
  9. 1/2 cup freshly grated Parmigiano-Reggiano cheese
  10. 2 large eggs, lightly beaten
  11. 1/3 cup milk
  12. 2 teaspoons salt
  13. 1/4 cup chopped flat-leaf parsley
  14. 1 1/2 pounds ground pork
  15. 1 pound ground beef
  16. 8 hero rolls, split
  17. 3/4 pound thinly sliced provolone cheese
Preheat the oven to 400° and brush 2 rimmed baking sheets with olive oil. In a medium skillet, heat the 1 tablespoon of olive oil. Add the onion, garlic, oregano, fennel seeds, sage and crushed red pepper and cook over low heat, stirring, until the onion is softened, 5 minutes; scrape into a bowl and let cool.

Add the bread crumbs to the bowl with the cheese, eggs, milk, salt and parsley. Add the pork and beef and knead gently until combined. Roll the mixture into 32 meatballs, about 2 1/2 inches each, and arrange them on the prepared baking sheets. Bake for 15 minutes, until nearly cooked through, shifting the pans from top to bottom and front to back halfway through baking.

Gently fold the meatballs into the warm tomato sauce in a pot. Simmer over moderate heat, covered, until cooked through, about 10 minutes.

Wipe off the baking sheets. Set the open rolls on the baking sheets and top both halves with the sliced provolone. Bake for about 5 minutes, until the cheese melts. Spoon the meatballs onto the rolls and top with the sauce. Serve right away.
Share/Save/Bookmark

Monday, January 24, 2011

Kale & White Bean Soup

I was in Boston last week and caught a miserable sinus infection. Usually when I am sick, I am not hungry which is a double-whammy bummer. But not this time...I am actually hungry! Last night, I managed to drag myself 4 blocks down the store to pick up some white kidney beans and a bunch of black kale. The kale is packed with nutrients and I knew a soup would soothe my throat. This recipe from epicurious hit the spot and made for a good leftover lunch this afternoon.

Kale & White Bean Soup
1 lb dried white beans such as Great Northern, cannellini, or navy
2 onions, coarsely chopped
2 tablespoons olive oil
4 garlic cloves, finely chopped
5 cups chicken broth
2 qt water
1 (3- by 2-inch) piece Parmigiano-Reggiano rind
2 teaspoons salt
1/2 teaspoon black pepper
1 bay leaf (not California)
1 teaspoon finely chopped fresh rosemary
1 lb smoked sausage such as kielbasa (optional), sliced crosswise 1/4 inch thick
8 carrots, halved lengthwise and cut crosswise into 1/2-inch pieces
1 lb kale (preferably lacinato), stems and center ribs discarded and leaves coarsely chopped

Preparation
Cover beans with water by 2 inches in a pot and bring to a boil. Remove from heat and let stand, uncovered, 1 hour. Drain beans in a colander and rinse.

Cook onions in oil in an 8-quart pot over moderately low heat, stirring occasionally, until softened, 4 to 5 minutes. Add garlic and cook, stirring, 1 minute. Add beans, broth, 1 quart water, cheese rind, salt, pepper, bay leaf, and rosemary and simmer, uncovered, until beans are just tender, about 50 minutes.

While soup is simmering, brown sausage (if using) in batches in a heavy skillet over moderate heat, turning, then transfer to paper towels to drain.

Stir carrots into soup and simmer 5 minutes. Stir in kale, sausage, and remaining quart water and simmer, uncovered, stirring occasionally, until kale is tender, 12 to 15 minutes. Season soup with salt and pepper.
Share/Save/Bookmark

Tuesday, January 18, 2011

Markets in Vietnam

These chickens were alive and stacked on top of one another ready for purchase. Yes, these are snakes. They make local 'hooch' with rice wine and dead snakes. It takes about 7 months to ferment. We tried a shot of this and it will put hair on your chest.

Selection of fresh fish and squid.

Studying up on candy, powders and spices.

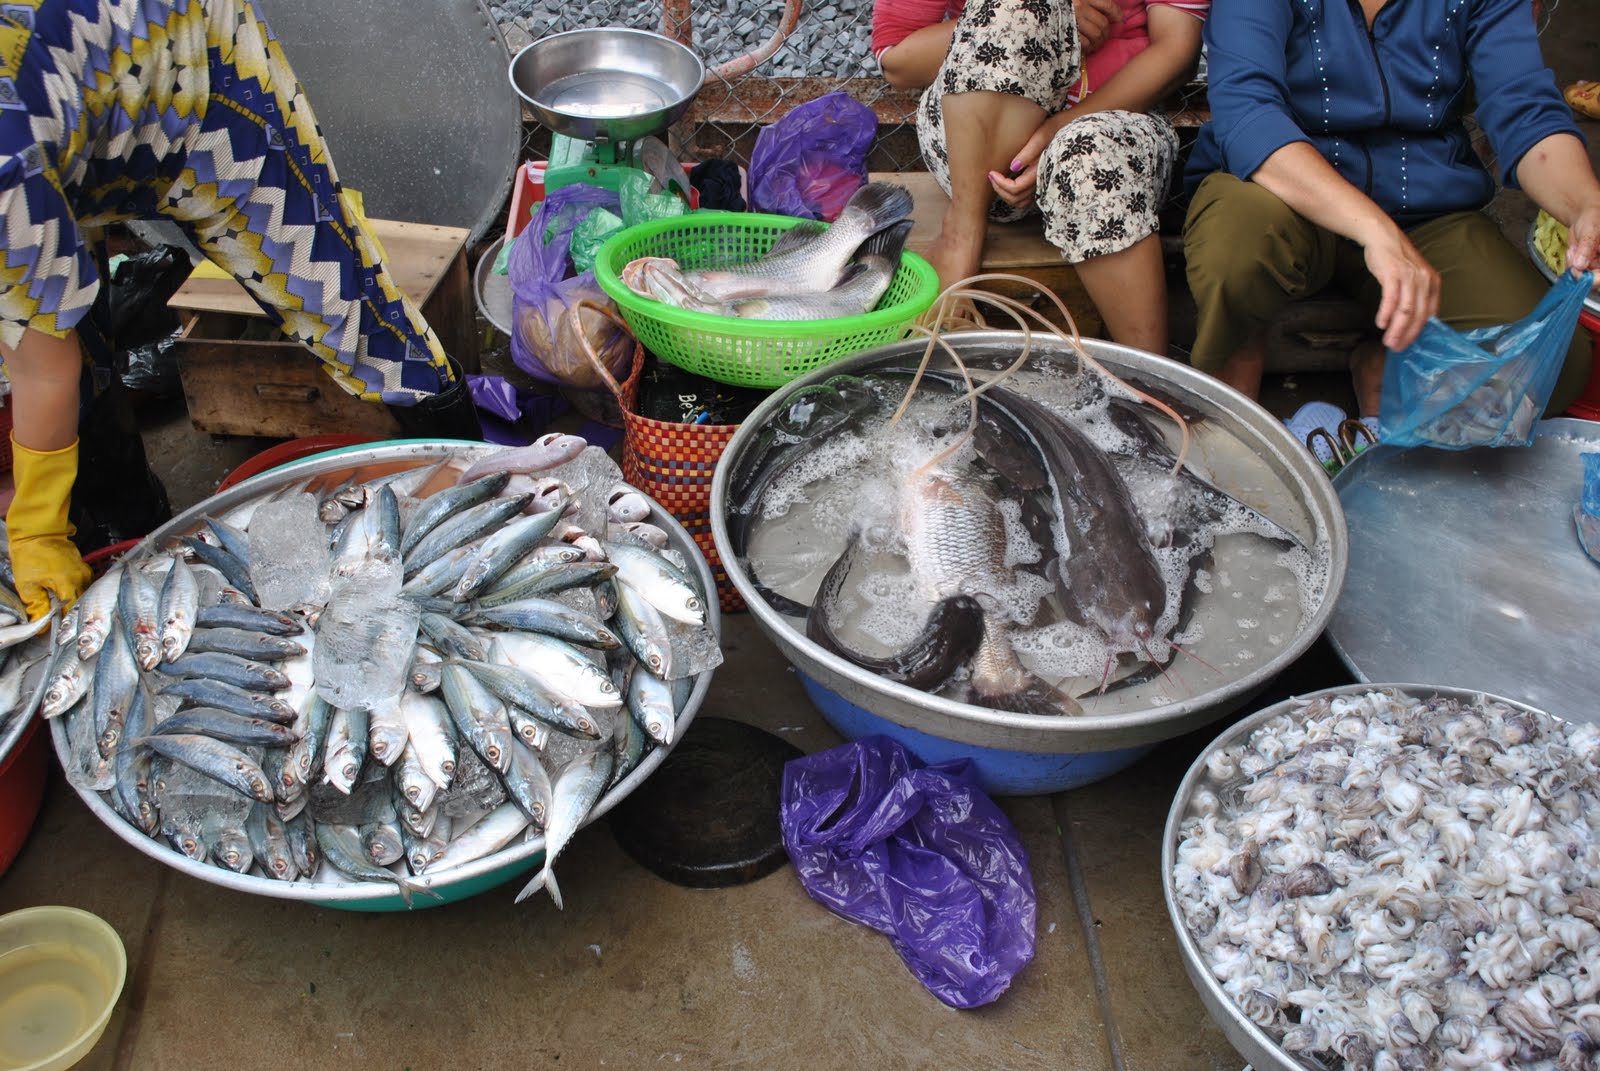
Market in Saigon. Tiger beer in hand after a delicious lunch at the counter behind me.

Market in the Mekong Delta. Our guide is teaching me about Vietnamese ingredients such as Pomelo.

Typical meat stand in the market.

Wide selection of local rice.

I really wanted to bring back a suitcase of these chilies.

Share/Save/Bookmark

Monday, January 17, 2011

Vietnamese Crepes (Banh Xeo)

On the very first beach day of our honeymoon in Hoi An, we ordered some Banh Xeo, which literally translates to 'sizzling cake'. Essentially, these are crepes stuffed with pork and shrimp and are usually eaten for breakfast or lunch and served with peanut sauce. I wish I had a picture of Drew's face after he had his first bite. This was easily his favorite dish of the trip.

These crepes are made out of rice flour (you can find Thai rice flour pretty easily in stores or specialty stores), water, turmeric powder and coconut milk. As I mentioned, they are stuffed with shredded fatty pork, shrimp, and bean sprouts and then pan fried. They can become habit forming so consider yourself warned.

Banh Xeo

makes 2 crepes

Crepes
1 cup rice flour (Thai version)
1/2 cup water
1/2 cup coconut milk
1/2 teaspoon turmeric
pinch of salt
vegetable oil for frying

Filling
4 ounces small shrimp
4 ounces sliced roast pork
4 scallions, sliced
2 cups bean sprouts

Wrap
leafy lettuce leaves
Mint, Thai or Vietnamese basil and cilantro

In a bowl mix the rice flour, water, turmeric and salt.

Heat a little oil in a 10 inch non-stick pan and cook the pork and shrimp. When cooked through, add the scallions. Add a little more oil, you may need a tablespoon or two to make the crepe very crisp and chewy. Pour in 1/2 cup batter on top of the fillings and tilt the pan to spread the batter into a crepe. Top with bean sprouts and cook for several minutes until the bottom of the crepe is beginning to turn brown and very crunchy. Fold the crepe in half and drain on paper towels. Serve with lettuce and herbs and peanut sauce.
Share/Save/Bookmark

Sunday, January 16, 2011

Sweet Tamarind Crab (cua rang me)


Thanks to a good friend and a Tony Bourdain episode, Drew and I had one of the best meals of our lives at Thi Nhan in Hoi An, Vietnam. Sweet Tamarind Crab is relativity easy to make but it's the freshness of the crab that makes the dish. Thi Nhan is just steps away from the beach and each morning the fish market is flooded with fresh crab.

It's a messy meal but so incredibly worth it. They serve the crabs with a mixture of lemon juice with a TON of sea salt and ground pepper. Sounds a little overwhelming? It is when you taste it on its own but with the crab it is DY-NO-MITE. If we had stayed an extra day in Hoi An we would have eaten there twice - without question.

Sweet Tamarind Crab (cua rang me)
Makes 8 servings
6 whole fresh crabs
3 tablespoons canola oil
3 shallots, finely chopped
2 tablespoons tamarind paste
4 cloves garlic, finely minced
2 teaspoons garlic powder
2 teaspoons salt
2 kaffir lime leaves (optional), torn in half
2 teaspoons chili garlic sauce
3 tablespoons soy sauce (or fish sauce)
2 tablespoons palm sugar (or granulated sugar)
2 teaspoons fresh ginger (see tips)
1/4 cup water
1/2 cup Thai basil leaves
2 teaspoons white pepper, freshly ground
juice of 3 limes, + extra for serving

Clean the crabs, brush and rinse thoroughly. Separate the 2 main claws from each crab. Set aside.

Remove and discard the abdominal flaps (the triangle-shaped tail). Lift and separate the back-fin with the rest of the claws by placing a large tablespoon at the bottom of the crab. Remove and discard the "lungs" (also known as Devil's fingers; they have a spongy texture); they're inedible. Gather the liquid, crab "butter" and corals from the inside of the crabs in a bowl. Discard the main shells.

Using a cleaver, cut the back-fins in half and slightly crack the claws. Gather the pieces of crab in a large mixing bowl. Add the garlic powder, salt and 1 teaspoon of pepper. Toss well. Marinate for at least 15 minutes.

In the same bowl containing the crab liquid, combine the kaffir lime leaves (if used), 1 teaspoon of ginger, sugar, soy sauce (or fish sauce) and tamarind paste.

Slightly bruise the basil leaves and coarsely chop them.

In a wok, heat the oil. Add the shallots and ginger and cook until slightly golden and fragrant. Add the garlic. As soon as the garlic is lightly browned, add the crab pieces. Jiggle the wok to make sure the crab does not stick to the bottom of the wok and is totally coated with oil. Add the tamarind mixture. Constantly toss the crab to ensure each piece is coated with the sauce. As soon as all the liquid is evaporated, add the chili garlic sauce. Toss for 30 seconds and add ½ to one cup of water and about 2 tablespoons of basil leaves. Cover and cook for about 8-10 minutes, stirring often. The crab meat should be white and opaque and the liquid should be evaporated as well. Do not over-cook the crab; otherwise the meat will be dry! Un-cover and add the remaining basil leaves and the lemon juice. Toss the crab and cook for another 2-3 minutes. Adjust the seasoning. Season with more salt (if necessary) and pepper; it should balance the sour taste of the tamarind paste and the sweetness from the palm sugar and shallots. Remove and discard the kaffir lime leaves.

Transfer to a large platter. Serve with little dipping bowls filled with lime juice, chili salt (or regular salt) and pepper.


Share/Save/Bookmark

Thursday, January 13, 2011

New Year's Resolution: Blog More

I hate New Year's Resolutions. We've seen it all before. In fact, I saw it in my yoga studio yesterday - a packed class. The weeks will roll by and soon it will be the middle of February and it will be me and the same 15 people at the 6:30pm class as usual. New Year's resolutions are a great idea but tend to lose momentum after a few weeks. Let's not kid ourselves.

I just got back from a 3-week honeymoon in Vietnam. In fact, in the last 2 1/2 months, I have spent over a month in Asia. This means I've had a lot of train, plane and automobile time to reflect on 2010 and the year that it's been for Drew and me.

This year, my New Year's resolution is to blog more. I mean it. I'm done being selfish. In the last 8 months, I've planned a wedding, got married, got a new job, went on my honeymoon and time flew by. My heart breaks every time a friend or loyal reader asks me over email or on the phone, 'where have you been?!?' I've been a slacker blogger for sure.

Well, fear not. This year is going to be big (even more so if Blogger gives me access back to my account and I am not posting under Drew's publishing privileges!) so expect more. Get excited.

Happy 2011. Eat, drink and be merry.

Elizabeth
Share/Save/Bookmark

Thursday, December 16, 2010

Red Beans and Rice a la Phelps

I just started a new job on Monday and today was the office's annual holiday potluck. Timing worked out great; I was able to meet the whole office and bond over food. The stand out dish was my co-worker's red beans and rice. It was hearty, spicy and I had three helpings. He was kind enough to share his mother's recipe. He prefers doubling the hot sauce portion and uses Frank's Red Hot. Super tasty.

Red Beans and Rice A La Phelps

6 servings:

1 LB dried red chili (little red) beans, washed and picked over
1 ham hock with lots left on
1 lb Andouille Sausage, cut into 1” pieces
.5-1lb bacon
1 Lg. onion, chopped
6 cups water
2 cloves garlic, chopped
Bay leaf
to taste: hot sauce (3 glugs) and Worchester sauce (3 glugs) salt (only add after beans are soft, you may not need with ham and bacon)

bring water to boil. add beans. Cook 2 minutes. Turn off and cover for 1 hour or overnight.
bring back to boil. add all ingredients except salt and rice. Cook @ 3 to 4 hours. Remove hocks and take the meat off the bone. Add it back to the pot. Mash some beans to thicken. Add salt to taste (not too much!)

Serve over rice.

Optional but great additions: chipotle chilis in adobo sauce, fresh hot sausage (1 lb.)
May be doubled. Freezes well!
Share/Save/Bookmark

Wednesday, December 1, 2010

Risotto with Butternut Squash, Leeks, and Basil

Has anyone else read the December issue of Bon Appetit yet? It's actually a bomb issue. And by bomb, I mean that you want to eat every picture you look at and cook every recipe. Well, at least that's what I thought when I saw it arrive in my mailbox. Doesn't this just scream winter, cold weather and comfort?

Remember to be patient with our good friend Risotto. You don't want it underdone or overdone and gummy. So just add a little stock, stir and repeat. It's a labor of love and so worth it. Race you to the stove!

Risotto with Butternut Squash, Leeks, and Basil

  • 3 tablespoons olive oil, divided
  • 4 cups 1/2-inch cubes peeled butternut squash (from 2 1/4 pounds squash)
  • 3 cups 1/2-inch-wide slices leeks (white and pale green parts only)
  • 1 tablespoon chopped fresh thyme
  • 2 cups arborio rice
  • 4 14-ounce cans (or more) vegetable broth
  • 1 cup chopped fresh basil
  • 3/4 cup freshly grated Parmesan cheese plus additional (for serving)

Preparation

  • Heat 2 tablespoons oil in heavy large pot over medium-high heat. Add squash and sauté until beginning to soften and brown around edges, about 5 minutes. Transfer squash to medium bowl.
  • Reduce heat to medium; add remaining 1 tablespoon oil, leeks, and thyme to same pot and stir until tender but not brown, about 5 minutes. Add rice and stir 1 minute. Add 1 cup broth and simmer until absorbed, stirring frequently, 3 to 4 minutes. Add remaining broth by 1/2 cupfuls, allowing each addition to be absorbed before adding next, stirring often, about 15 minutes. Return squash to pot. Continue to cook until rice is just tender but still very creamy, stirring gently and often, about 10 minutes longer (about 25 minutes total cooking time). Remove from heat. Stir in basil and 3/4 cup freshly grated Parmesan cheese. Season to taste with salt and pepper. Transfer to large bowl and serve with additional Parmesan cheese.


Share/Save/Bookmark

Mike's Famous Holiday Eggnog


'Tis the season for all that is gluttonous! Just so happens to be my absolute favorite time of year! Shocking, right? Our house literally looks like the North Pole and I've been working around the clock to Christmas tunes on Pandora. I'm such a dork.

No winter holiday is complete without eggnog. So...back by very popular demand for the 3rd year in a row is (drum roll please...) MIKE'S FAMOUS EGGNOG!!!

Dear Reader, enjoy the holidays but do me a favor and don't drink and drive. Love you.

Eggnog in Quantity

• Be sure to use good fresh eggs. The best eggs have a firm orange yolk and are from hens that have access to free range.
• Use heavy whipping cream. This is not a drink that is successful in a low fat version.
• Use good quality liquor. I use a combination of liquors to spread out the flavors. The saying that "nothing succeeds like excess" is especially true when it comes to adding booze to the eggnog. The Brits say that "Christmas brandy will make you randy", so add an extra splash.
• Use fresh nutmeg kernels and grate onto each serving as desired.

Beat separately until light in color
12 egg yolks
Beat in gradually
1 lb. confectioner's sugar
Add very slowly, beating constantly
2 c. dark rum, brandy, or bourbon
These liquors form the basis of the "nog", and you may choose one
variety or mix to taste.

Let mixture stand covered for 1 hour to dispel the "eggy" taste.

Add, beating constantly,
3 cups of liquor (I use a combination and include some Kahlua)
2 quarts whipping cream
1 tsp vanilla (or to taste)
Refrigerate covered for 3 hours.

Beat until stiff but not dry
12 egg whites

Fold egg whites lightly into the other ingredients. Serve sprinkled
with fresh nutmeg and cinnamon to taste.

Yield is about 1 gallon. I always make a double batch. With all that liquor it keeps very well refrigerated. The egg whites will separate after standing so fold them back in. A jar of this eggnog makes a great holiday present. Have a cup while opening your presents. You'll love them all!

This is a very rich, high-cholesterol, high-octane eggnog. Do not operate heavy equipment after drinking.
Share/Save/Bookmark

Monday, November 22, 2010

Kung Pao Chicken


One of the dishes that I ordered more than once in Beijing was Kung Pao chicken. This dish is a schezuan staple. While the meal above was tasty, it wasn't as spicy as I had hoped it would be and I ended up drowning it in chili oil. Apparently, I've built up quite the tolerance over the last couple of years. Make sure you use unsalted peanuts or the dish will be ruined and control the heat using more or less chilies.

Kung Pao Chicken
3 pounds boneless, skinless chicken breasts, cut into 1-inch cubes
3 large egg whites
2 teaspoons salt
3 tablespoons Asian sesame oil
3 tablespoons cornstarch
3 cups peanut oil
6 dried red chilies
1½ cups unsalted peanuts
6 tablespoons minced garlic
½ cup finely chopped scallions
2 tablespoons chopped fresh ginger
1/3 cup chicken stock or canned chicken broth
1/3 cup Shaoxing rice wine or dry sherry
5 tablespoons reduced sodium soy sauce
2 teaspoons sugar
2 tablespoons Chinese black rice vinegar.

1. In a medium bowl, combine chicken, egg whites, 1 teaspoon of the salt, 1 tablespoon of the sesame oil and 2 tablespoons of the cornstarch. Mix well.

2. Place a large wok over high heat until hot. Add peanut oil. When oil is very hot, remove wok from heat and immediately add chicken pieces, stirring to keep them from sticking. When the pieces are white on all sides, after 2 to 3 minutes, drain them and all the oil through a stainless-steel colander in a heatproof bowl. Reserve 5 tablespoons of the oil, and discard remainder.

3. In a small bowl, combine remaining 1 tablespoon cornstarch with 1/3 cup water; mix well and set aside. Reheat wok with reserved oil. When very hot, add chilies and stir-fry until slightly blackened. Add peanuts, garlic, scallions and ginger, and stir-fry until lightly browned.

4. Add chicken pieces, stock, rice wine, soy sauce, sugar, vinegar, remaining 1 teaspoon salt and remaining 2 tablespoons sesame oil. Mix well, and stir in cornstarch mixture. Stir-fry for 2 minutes, then reduce heat to low and let mixture sit for 2 to 3 minutes. Mix again, and serve.


Share/Save/Bookmark

TEASPOON WILLIE’S SAVORY CHILI


An old friend from high school reached out to me on Facebook and told me about this new company he started with some friends called Teaspoon Willies. He was nice enough to send us a couple bottles to check it out and sure enough we blew through it in a matter of weeks. It's good on everything from eggs to marinades and even in bloody mary's. Fall weather has arrived and football is well under way. I can't think of a better way to use Teaspoon Willie's sauce than in this savory chili recipe. To get some of your own sauce, visit their site. Thanks for sharing this with us, Kevin!

TEASPOON WILLIE’S SAVORY CHILI(Serves 8-10)
Ingredients:
• 1.5 lb of ground beef/buffalo
• 1 large yellow onion, chopped
• 1 yellow green pepper, chopped
• 1 charred pablano pepper*
• 2 charred hatch chili’s (medium heat)*
• 1-2 carrots, chopped
• 1-2 stalks of celery
• 1 can of black beans
• 1 can of pinto beans
• 1 can of navy beans
• ¼ Cup of olive oil
• handful fresh parsley
• handful fresh cilantro
• 4 cloves garlic
• salt and pepper to taste
• 1 bottle of Teaspoon Willie’s Spicy or Everything Sauce
• 2-3 lbs tomato sauce all natural/organic
• 1 can of tomato paste

Directions:
*To char put the pablano and hatch chilies in a bowl and cover with olive oil and salt.
Make sure the pablano and hatch chilies are covered well. Turn on the grill or
broiler and char the outside. After they are charred, let them cool and chop up the
peppers. Make sure you keep the burned skin on the peppers, it gives great flavor
to the chili.

Heat a pot to medium-high. Chop up all the veggies, herbs, and spices. Put some oil
in the pot and mix veggies, herbs and spices. Add some salt and pepper to taste.
Cook for about 3-4 minutes. Next add beef/buffalo and the charred pablano and
hatch chilies. Chop up meat until it becomes fine, about 3-4min. Add about 10 oz of
Teaspoon Willie’s, tomato sauce, and tomato paste. Drain the beans of their liquid
and add to the pot as well. Let this simmer on low-medium for a couple of hours. Add
more Teaspoon Willie’s if you want to bring out more flavor.

*Remember that Teaspoon Willie’s Spicy will build heat with prolonged cooking.
This will produce VERY spicy Chili with phenomenally great taste. Add some of your
favorite cheese and/or sour cream (this will also bring down the spiciness). Enjoy!
Share/Save/Bookmark

Wednesday, November 10, 2010

Back from Beijing!


Dear Reader, I am finally back from a long trip to Beijing. I have over a hundred pics and a couple videos from my culinary journey that I cannot wait to share with you. For starters, here are some pictures taken from the Wangfujing Night market. As you can see, some pretty crazy stuff there that I was not brave enough to try.

On another note, Blogger has locked me out of my account so I am posting using my best friend's account. If you see Carrie, that's me until I can sort it out. More soon. Promise!
Share/Save/Bookmark

Friday, October 15, 2010

Widespread Panic Baked Ziti

Remember when you were in high school and you would 'carbo-load' the night before the big game? What if I told you that I'm going to carbo-load for a concert? It's ok, you can laugh at me.

My favorite band is in town and it's the one time a year that I can let loose and dance like a hippie for 3 1/2 hours. I've been seeing these guys for 12 years and after every show I am starving. This year, I thought that if I stock up on carbs before the show that maybe I won't need that burger at midnight. I figure it's worth a try. Here's what's on the menu...

Widespread Panic Baked Ziti
  • 12 ounces ziti (about 4 cups)
  • 1 tablespoon olive oil
  • 1 large onion, chopped
  • 2 cloves garlic, finely chopped
  • 1/4 pound lean ground beef
  • 1/4 pound Italian Sausage, removed from casing
  • kosher salt and black pepper
  • 1 26-ounce jar marinara sauce
  • 1 bunch spinach, thick stems removed (about 4 cups)
  • 1/2 cup ricotta
  • 1/2 cup grated Parmesan (2 ounces)
  • 1 cup grated mozzarella (4 ounces)
  • 1/2 teaspoon red pepper flakes
  1. Heat oven to 400° F. Cook the pasta according to the package directions. Drain it and return it to the pot.
  2. Meanwhile, heat the oil in a large skillet over medium heat. Add the onion and garlic and cook, stirring occasionally, until they begin to soften, 4 to 5 minutes.
  3. Add the beef, sausage, ¾ teaspoon salt, and ¼ teaspoon pepper, red pepper flakes and cook, breaking up the meat with a spoon until it’s no longer pink, 5 to 6 minutes.
  4. Toss the pasta with the meat mixture, marinara sauce, spinach, ricotta, and ¼ cup of the Parmesan.
  5. Transfer to a 9-by-13-inch baking dish or 4 large ramekins. Sprinkle with the mozzarella and the remaining ¼ cup of the Parmesan. Bake until the cheese melts, 12 to 15 minutes.

Share/Save/Bookmark

Thursday, October 7, 2010

Maple-Glazed Peanuts & Bacon

I was just browsing on the Food & Wine website this afternoon and came across a recipe for this peanut concoction. Suddenly, it hit me...I've eaten these before! See friends, there are some great people out there that send me random foodie stuff in the mail. I've received books, cheeses, special sauces, bacon chocolates and much more. But probably my favorite package came from my friend in NYC about 2 years ago that sent me a jar of these peanuts. According to the article, these have become so popular that The Red Head Restaurant in NYC now sells these online. With this recipe, you can skip the shipping fees and make it right at home.

Maple-Glazed Peanuts & Bacon
  1. 3 thick slices of bacon (3 ounces)
  2. 1 tablespoon thyme leaves, minced
  3. 1 tablespoon kosher salt
  4. 3/4 teaspoon Old Bay Seasoning
  5. 1/2 teaspoon cayenne pepper
  6. 1/2 teaspoon dry mustard
  7. 3 cups unsalted roasted peanuts (1 pound)
  8. 1/2 cup pure maple syrup
  1. Preheat the oven to 325°. In a medium skillet, cook the bacon over moderate heat until crisp. Transfer to paper towels to drain, then finely chop.
  2. In a medium bowl, mix the thyme, salt, Old Bay, cayenne and dry mustard. Add the peanuts, maple syrup and bacon and toss until the peanuts are evenly coated. Scrape the nuts onto a parchment paper–lined baking sheet and roast for about 30 minutes, stirring once, until the maple syrup has thickened. Let the peanuts cool completely, stirring frequently to break up any large clumps. Transfer the peanuts to glass jars or a large bowl and serve.
The peanuts can be stored in an airtight container for up to 5 days.

Share/Save/Bookmark

Wednesday, September 29, 2010

You buy clothes, I buy tomatoes

If Drew gave me $100 bucks and said 'go have fun', I'd probably end up at the farmers market or some specialty grocery store. It's sad really. As I write this, I notice that I am wearing a pair of jeans that I bought my first year out of college. But how can you possibly resist these gorgeous heirlooms above or anything that's in its prime for that matter? I mean, these looked so pretty that I had to take a picture on my phone and email it to Drew.

Heirloom tomatoes came into their prime very late this year and so far it's been worth the wait. I just wash them and serve them sliced with salt and pepper as a side dish and I've heard no complaints from my guests. Know your seasons and know your fruits and veggies. It's pretty easy to cook when you don't have to do much to something that is already perfect.
Share/Save/Bookmark